
Beginner's Guide to Setting Up Proxifier

Simplify your online life with Proxifier, an essential tool for managing your internet traffic via a proxy server. This software boosts your online privacy and helps bypass restrictions seamlessly. It's perfect for those seeking control over their network connections, offering a solution far beyond basic settings. For top-notch proxy providers that complement Proxifier, don't miss my recommended list. Proxifier is a game-changer for both personal and professional use, broadening the scope of what you can achieve online. Now, let's get to the exciting part: setting up Proxifier for enhanced internet freedom.
Why Use Proxifier?
Proxifier bridges your apps to your chosen proxy server, directing online data with precision. This tool is key for accessing restricted content or securing data on public Wi-Fi. It's particularly useful for professionals testing apps in different network conditions. If you're debating between a proxy and a VPN, my blog post on why proxies might be the better choice is a must-read. Proxifier offers a secure, unrestricted browsing experience, laying the foundation for a better online environment. Without further ado, let's dive into how you can set up Proxifier and maximize your internet capabilities.
How to Set Up Proxifier
To start using Proxifier, first, get a proxy server from a trusted provider. You'll need the server's IP, port, protocol, and sometimes login credentials. This information is key to configuring Proxifier to direct your internet traffic through the proxy.
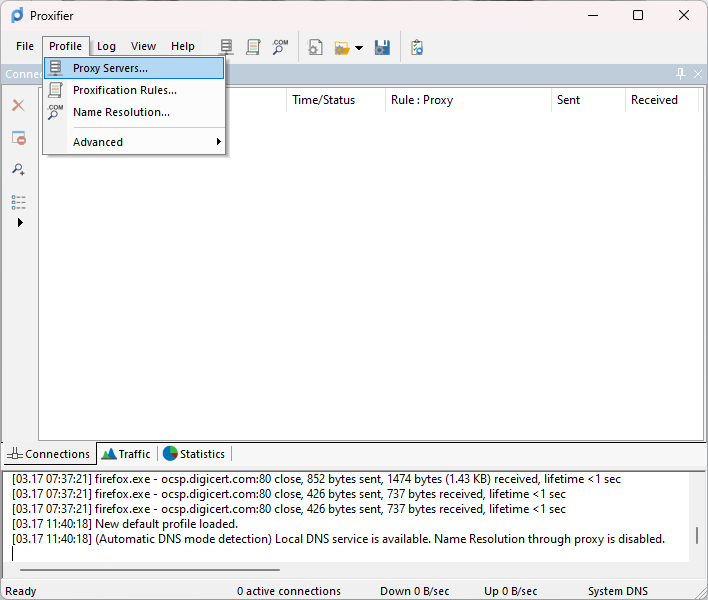
After gathering your proxy server details, add them to Proxifier. Open the application, go to "Profile," and select "Proxy Servers..." to input your proxy details. This is the first step toward a more secure and controlled internet experience.

When you select "Proxy Servers..." a new window appears. Here, enter your proxy's IP address or the connection address for rotating proxies in the "Address" field. Check the "Port" field matches the protocol your provider, such as IPRoyal, specifies, as ports vary with protocol. Under "Protocol," choose the correct protocol your proxy uses, like HTTPS or SOCKS5, available from your provider. Ensure the selected protocol aligns with the specified port. If your proxy requires authentication, activate it by selecting "enable," then input your username and password. For proxies not based on IP whitelisting, this step is necessary. For whitelisted proxies, verify that your IP is approved on their end.

After entering your details, press "okay," and a prompt will appear. It queries whether to apply the proxy settings across all computer applications. For universal proxy application, select "Yes" and proceed to this guide's final step. To customize proxy use by application, choose "No" and continue to the next step.


For application-specific proxy settings, go to "Profile", "Proxification Rules...", then “Add…” on the new window that pops up to specify which applications will use the proxy. This allows for more granular control over your internet privacy settings.

When the window appears, it's crucial to concentrate on three areas: "Name", "Applications", and "Action". Start by naming your rule, such as "Firefox US Proxy", to clarify its purpose. In "Applications", input the exact application name you intend to route through the proxy, like "firefox.exe", which you can find in the task manager. If you're adding more than one application, separate their names with a semicolon. Lastly, in the "Action" section, choose the specific proxy server this rule will use, then finalize by clicking "Ok" twice to apply your settings.

Remember, Proxifier doesn’t automatically save your settings. To keep your configurations, click on "File", then choose "Save Profile As..." and name it something you'll remember.
That wraps up our guide to setting up Proxifier. You're now equipped to navigate the internet with more privacy and flexibility than ever before. As you venture into this enhanced online experience, think of Proxifier as your digital Swiss Army knife, ready to tackle any connectivity challenge. Here's to exploring the vast cyberspace with confidence and security!


